Homemade Lemonade

The perfect refreshment for those hot summer days. It's quick, easy and you can feel good about serving it to your family.

Moist Gluten Free Yellow Cake

A beautiful delicious cake with a texture so good your family won't know it's gluten-free.

Curried Wild Rice and Curried Green Beans

A wonderful dish full of flavor your whole family will enjoy.

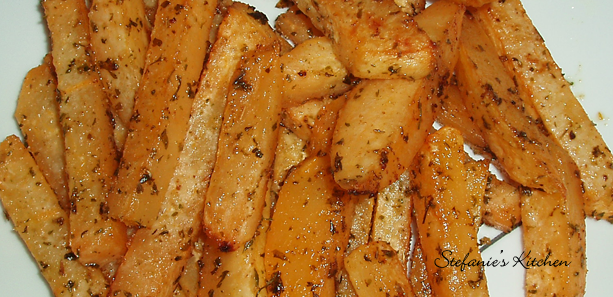
Rutabaga Fries

Seasoned rutabaga fries are a great potatoe alternative.

Homemade Eggless Mayo

A thick and creamy homade eggless mayo recipe with a dairy-free version.

Sunday, December 22, 2013

Gluten-Free Dutch Baby

I've recently discovered the Dutch Baby or German Pancake. It is so good!!! For me it is very close to french toast when drizzled with syrup. I add cinnamon to mine but traditional is completely plain with no added spices or flavorings.

A Dutch Baby has a puffy crisp crust and a custard center. The first time I made it I didn't realize it was supposed to have a custard center and thought I had not made it properly. I like it with extra butter so that when it is done there is a little pool of melted butter. If you want to reduce the butter in the pan by half, it will still come out nicely. Traditional toppings are lemon and butter, powdered sugar, sauteed fruit, or syrup.

I plan to try various versions including savory ones. I will post any that turn out good. There are numerous recipes out there, and most are the same. I adapted my version off of this recipe.

Gluten-Free Dutch Baby

1/2 cup brown rice flour
2 Tbsp arrowroot flour
1/2 tsp sea salt
1/4 tsp cinnamon (optional)
2 large eggs, room temperature
2 Tbsp butter, melted and cooled
1/2 cup milk, room temperature
2 to 3 Tbsp butter for the pan

Preheat oven to 425.

Melt 2 Tbsp butter and set aside to cool a little. In a glass baking dish (mine is a 2 quart) add the 2 or 3 Tbsp of butter and place in the preheating oven to melt. Be careful not to burn it.

While the butter is melting and baking dish is preheating, mix the flours, sea salt and cinnamon in a bowl. I used a whisk to combine. Whisk in the eggs and milk until smooth. Whisk in the cooled 2 Tbsp of butter.

By now the butter is done melting and baking dish is preheated. Take the baking dish out of the oven and coat the dish with the butter by tilting or using a brush. Pour the batter into the dish. The butter will pool but do not mix. Place immediately in the oven.

Bake for 15 minutes and then reduce temperature to 350 degrees and bake for an additional 10 minutes. When done, allow the dutch baby to set for a few minutes in the oven with the door open. The dutch baby will fall when taken out of the oven so don't think you did anything wrong. Drizzle with syrup or topping of your choice and serve immediately.

*** NOTES:  You can also make this in a cast iron pan. If you do, increase the beginning baking temperature to 450. Be sure to preheat the pan before adding the batter. If you wish to make a double batch you can use a 9x13 baking dish. You can also use ramekins to make individual dutch babies. Adjust baking time.



Sunday, December 15, 2013

Duffy's Tavern & Grill Kennebunk, Maine : Gluten-Free Friendly


This is my first review of gluten free friendly restaurants so please bear with me. I am in no way affiliated with the restaurant, nor was the review requested.

I recently had lunch with my sister and her husband, both of which are gluten intolerant. I wanted to treat them to something special and not a home cooked meal. I did some searching online and found Duffy's Tavern & Grill in Kennebunk, Maine. They are located in the historic Lafayette Center overlooking the Mousam River. The restaurant has a nice, comfortable atmosphere. Seating over 200, you have the choice of a table or sitting at the bar. If you are into catching a game while dining, you can watch it on one of their big screen TVs.

Duffy's has an extensive gluten-free menu which made making a decision of what to order take longer than normal. Usually you're lucky if you can find a restaurant with more than a few basic gluten-free options. You can download their current menu here. If you have allergies they recommend you consult the manager prior to placing an order to ensure that all your needs are met. This is always a wise decision regardless of where you dine.

Duffy's offers gluten-free beers O-Mission and Redbridge, as well as, all of their wines and cocktails being gluten free. A number of non-alcoholic choices are available as well. They can serve your burger or sandwich on GF bread, they offer GF pasta, GF pizza, GF baked haddock by swapping crumbs for fresh pico de gallo, and all their fresh salads are gluten-free to which you can add chicken, steak tips, turkey or lobster to make the ultimate gluten-free salad. With a number of GF starters and main dishes to choose from, Duffy's is definitely on my list of top gluten-free friendly restaurants.

My sister and her husband ordered Duffy's Burger which came with lettuce, tomato and onion on GF Allergeena's homemade honey buttermilk bread. They also had a side of the house vegetable which was steamed carrots I believe. They both enjoyed their burgers and were impressed with the menu selection.

Would we recommend them? Yes. If you have anyone in your family with gluten intolerance, Duffy's really is a great place for everyone to feel satisfied with the options offered. They certainly won't feel they are missing out.

What about the cost? The Duffy's Burger was $11.99.  I thought their prices were average for a nice sit down restaurant and reasonable when you consider that gulten-free breads and other options are usually more expensive. The do offer take-out as well. You can order online but I would recommend you call to ensure your gluten-free needs are met.

With Christmas and the New Year just around the corner, a Duffy's Gift Card would be a terrific gift for anyone local to the area. Visit their website for more information www.duffyskennebunk.com Do you have a favorite Gluten-Free friendly restaurant you would like to share with others? If so, please share in the comments below.

Gluten Free Baked Oatmeal

I am not an oatmeal for breakfast fan. It's the texture of gloppy glue and no matter how much butter and goodies I add, I just can't stand it. Baked oatmeal is completely different. I've made baked oatmeal in the past and my husband and I really enjoyed it.

It is easy to change it up and add fruit, berries, and/or nuts to your liking. Below is a reduced sugar version. Believe it or not when I made it this morning I reduced the sugar by half and we enjoyed it. If you have someone in your family that likes stuff super sweet you could drizzle raw organic honey, agave, or maple syrup over the top to sweeten it up for them. Topping with yogurt or on the side makes for a terrific breakfast.

Note: I made this with extra thick rolled oats. If you are using thinner oatmeal you may want to reduce the milk by 1/4 cup.

Gluten Free Baked Oatmeal

1 1/2 cups GF Oatmeal - Bob's Red Mill Extra Thick
1/2 tsp sea salt
1 tsp cinnamon
1/4 cup brown sugar
3/4 cup milk
1 egg
1/4 cup butter, melted
1 pear, peeled & chopped
1/4 cup raisins * optional
1/4 cup walnuts, chopped * optional

Preheat oven to 350 and grease a 9x9 baking dish.

Mix together the butter, eggs, and milk.  In another bowl combine the oats, salt, cinnamon, and brown sugar. Combine the wet ingredients with the dry and mix well. Stir in the fruit and/or nuts. Spread in the prepared baking dish. Bake for 35 to 40 minutes. Server warm as is or drizzle with raw honey, agave, or maple syrup. Top with yogurt or serve on the side. 

* Any variation of fruits, berries, dried fruits, and nuts will work. You can also add other spices and/or vanilla. Get creative and enjoy!!


Wednesday, July 10, 2013

Whole Wheat Herb Sourdough Crackers

Here's another variation on the crackers you can make from the starter discard. If you missed the last post on using the discarded portion of your sourdough starter after feedings, you may want to check it out. That recipe rye and spelt. You can easily do that recipe if you prefer to use spelt and rye over whole wheat. You could even do a combination of all three if you wanted. You might just have to play around with the flour amounts. And there are so many variations you can do by changing what spices or herbs you add. These crackers make use of starter that would otherwise end up in the trash and make a nice snack to have on hand or pack as part of a lunch. Much healthier than the processed crackers in the store with all their additives but still very tasty. My brother-in-law tried some today and said they taste like cheese. I think they have a bit of a cheese flavor as well. Very yummy.

Whole Wheat Herb Sourdough Crackers

1 1/2 cup starter discard
6 Tbsp melted butter, cooled
3/4 tsp sea salt
1 1/2 tsp parsley
1/2 tsp dill
1/2 tsp chives
1/2 tsp basil
1/2 tsp paprika
1 tsp garlic powder
1 tsp onion powder
2 to 2 1/2 cups organic whole wheat flour

Toppings:
Butter and/or olive oil
Himalayan Sea Salt

In a bowl, combine the starter, melted butter, sea salt, parsley, dill, chives, basil, paprika, garlic powder, and onion powder. Stir to combine. Add 2 cups of whole wheat flour and knead until all the flour is worked into the dough. It should make a stiff dough. If needed, knead in up to half a cup more flour for a total of two and a half cups of flour. If your starter is on the wetter side, then you may need to add a little more flour. Likewise, if your starter is on the thicker side, you may need a little more water. You want it to be stiff and you may think it a bit on the dry side but it will be fine. See the picture below for what my dough looked like after kneading in all the flour.


Cover the the dough with plastic wrap and allow it to ferment at room temperature for 12 or more hours. I let mine go about 17 hours. I think it gives them more flavor.

Once the dough has fermented, preheat your oven to 350F. Grease a cast iron griddle or baking sheet. The cast iron gives excellent results for perfectly crisp crackers. Cut the dough into four equal pieces. Take one of the pieces and squeeze it in your hands to warm the dough a little and make it easier to roll out. Place the dough on the greased baking griddle or pan and roll it evenly and very thin. Brush with a little melted butter or olive oil. You can even make a mixture of the two if you wish. Sprinkle with the sea salt. Use a dough cutter or a pizza cutter to cut the dough into the desired size crackers.

Bake for 18 to 23 minutes until golden brown. Remove them from the baking pan and allow to cool. They will crisp more as they cool. Depending on how thin you roll your dough and what you use for a baking pan will determine how long they take to bake. For myself I rolled them very thin and baked them on a cast iron griddle for 23 to 24 minutes and they were nice and crisp.

Repeat the process with the remaining three pieces of dough or you can freeze the remaining dough in freezer bags for later use. It is best to double bag your dough when you freeze it. I put the dough in freezer bags, getting out as much air as possible and then place those bags in a larger freezer bag. When you are ready to use the dough, simply take out a bag and allow it to defrost in the bag for a couple of hours and you should be ready to go.

Sourdough Crackers From Starter Discard

Many people ask what they can do with the discarded starter from the feedings. I does seem like a shame to throw starter away but there are times it is just the thing to do. If you didn't discard some of the starter or use it, you would continue to double the amount you have and before you know it, you would have a monster on your hands. I can remember not wanting to waste any and at one point I ended up with so much starter I was baking all day and into the night because I had so many loaves and other bread goods going, thinking I would just use all the extra. As one loaf would be ready for kneading, resting, fermenting, on it's final rise or baking, another was ready for one of those steps. It was a nonstop day of baking I will never forget. I learned my lesson. If you find yourself in the situation with too much starter, no time to bake with it, no room to store it, and can't give any away, then by all means toss the extra. As good as fresh sourdough breads are, the sore arms from all that kneading and blood shot eyes from staying up until morning, is just not worth it. Trust me.

There are many things you can make with the discard from a healthy starter rather than tossing it in the trash, crackers are one of them. They are simple to make and very tasty. I think the sourdough gives them a little bit of a cheese flavor. You can get very creative with seasonings and even make sweet crackers with cinnamon and other similar spices. I made a couple different kinds today. We really liked them and they are already almost half gone. The first couple batches went fast.

Sourdough Spelt Rye Crackers
1 cup rye stater discard
1 1/4 organic spelt flour
1/4 cup organic rye flour
1/2 tsp sea salt
2 Tbsp organic palm shortening, melted
1/4 cup melted butter
1 Tbsp caraway seeds

Toppings:
Butter and/or olive oil
Himalayan Sea Salt

In a bowl, combine the starter, sea salt, caraway seeds, and the melted butter and palm shortening that has been cooled. Stir to combine. Add the spelt and rye flours knead until all the flour is worked into the dough. It will make a stiff dough. If your starter is on the wetter side, then you may need to add a little more flour. Likewise, if your starter is on the thicker side, you may need a little more water. You want it to be stiff and you may think it a bit on the dry side but it will be fine. See the picture below for what my dough looked like after kneading in all the flour.


Cover the the dough with plastic wrap and allow it to ferment at room temperature for 12 or more hours. I let mine go about 17 hours.

Once the dough has fermented, preheat your oven to 350F. Grease a cast iron griddle or baking sheet. The cast iron gives excellent results for perfectly crisp crackers. Cut the dough into four equal pieces. Take one of the pieces and squeeze it in your hands to warm the dough a little and make it easier to roll out. Place the dough on the greased baking griddle or pan and roll it evenly and very thin. Brush with a little melted butter or olive oil. You can even make a mixture of the two if you wish. Sprinkle with the sea salt. Use a dough cutter or a pizza cutter to cut the dough into the desired size crackers.


Bake for 18 to 23 minutes until golden brown. Remove them from the baking pan and allow to cool. They will crisp more as they cool. Depending on how thin you roll your dough and what you use for a baking pan will determine how long they take to bake. For myself I rolled them very thin and baked them on a cast iron griddle for 23 to 24 minutes and they were nice and crisp.

Repeat the process with the remaining three pieces of dough or you can freeze the remaining dough in freezer bags for later use. It is best to double bag your dough when you freeze it. I put the dough in freezer bags, getting out as much air as possible and then place those bags in a larger freezer bag. When you are ready to use the dough, simply take out a bag and allow it to defrost in the bag for a couple of hours and you should be ready to go.

Eggless Mayonnaise

Finally a decent and easy recipe for mayonnaise that isn't made with eggs. I know it's supposed to be fine to have the raw eggs but it really grosses me out. So, I have tried many many times to make it without eggs and had no success. After experimenting for a bit, I feel I hit a winner.

I have made the recipe below with coconut milk and it works as well. It wasn't quite as thick but I think that is because I added the oil too fast that time. It's a good non-dairy alternative. Note: I added another 1/2 Tbsp arrowroot to the coconut version. This mayonnaise keeps only as long as the milk or coconut milk. So, if you are using milk that is ready to expire in two days, that's how long your mayo will be good.

Some things to keep in mind. Emulsions break if you add the oil too fast or if it gets too hot. That is why it is important not to over process or the motor on the blender can heat the mayonnaise and suddenly, what was thickened, is soup. Another thing is not to add too much oil and make sure you have enough acid. It is also good for the milk to be cool but not supper cold. That can prevent the mayonnaise from thickening properly too. The recipe below works well and covers all those bases. If you find it didn't thicken up, maybe you are adding the oil too fast. Yet, you don't want to add it so slowly that it over heats before you are done. Example: Adding the oil a single drop, wait, a single drop, wait. That is good with egg mayo but not with this one.

Eggless Mayonnaise

1/2 cup water
2 Tbsp powdered milk
3 tsp lemon juice
1/2 tsp raw apple cider vinegar
1/4 tsp ground mustard or a squirt of prepared
1 Tbsp arrowroot powder
1/4 tsp onion powder
1/8 tsp garlic powder
1/2 to 1 tsp sea salt
1/2 tsp sugar or half a stevia packet
1 cup grapeseed oil

In a high powered blender, combine the water, powdered milk, lemon juice, vinegar, mustard, arrowroot, onion and garlic powder, sea salt, sugar or stevia. Blend for a moment to combine ingredients. Then with the blender running on high, add just a few drops at a time or a very short trickle. Wait 30 seconds and add more in the same manner. Once it starts to thicken you can add a short thin stream of oil, pause 20 seconds, add more and continue in this manner until all the oil has been added and the is mayonnaise very thick. Don't over process. Store in a airtight container for up to 5 days if using powdered milk. It will thicken even more once it is fully chilled and the flavors will be better.

Note: If it is warm at all, don't cover it right away. Just place it in a container with the lid off and put it in the refrigerator for 10 minutes or so. Then put the lid on after it is cooled. If you put it on too soon, you will end up with water from condensation on the top.

Coconut Milk Version: If using coconut milk, replace the water and powdered milk with 1/2 cup coconut milk and add 1/2 Tbsp of arrowroot powder.